The Walking Simulator
First of all, let’s clear your project.
You can either delete everything inside the scene or create a brand-new project.
I'm simply deleting the unnecessary nodes to prepare for the next steps.
Just don’t delete the DirectionalLight3D and WorldEnvironment nodes.
(If you delete them by mistake, you already know how to add them back from the previous lesson.)
-6b6dea210ff4bdae5460d93ed6a062d3.png)
Creating the Player
Add a CharacterBody3D node.
(From now on, I won’t repeat how to create nodes. If you forget, here’s a hint: Press Ctrl + A)
-bd177add0493b5a0e1831a6330bba355.png)
If something isn’t clear or you can’t remember how you did it before, go back and check again.
It’s totally normal - it doesn’t mean you have a bad memory. It just means your brain learns differently.
If you can remember everything without checking, that’s great!
But always make things clear. Ask questions, explore, experiment!
Rename CharacterBody3D to “Player.”
Next, add these nodes as children of Player:
- MeshInstance3D
- CollisionShape3D
- Camera3D
-9fa076194db5fe5680ba5138d159b996.png)
For the MeshInstance3D, set the Mesh property to CapsuleMesh.
-6ed267439f1aa72201527474ad391b4e.png)
For the CollisionShape3D, set the Shape property to CapsuleShape3D.
-fdb07c47c33471505b08dac583e3a7f2.png)
Now set the Player camera’s position to 0.5 on the Y axis.
-362dfeea99329388926b446c8c05cf06.png)
Next, select the Player node and attach a script.
-e82a9061bd9ba984a25b2d49b6540239.png)
You’ll see this window. Look carefully at the file path -
it tries to save the script inside the scenes folder,
but we want all scripts inside the scripts folder.
Click the little folder icon.
-02b5127f9d44b7481e7e33755644edcd.png)
Use the arrow button to go to the project root,
then navigate into the correct scripts folder.
-f52401a86ddb9ad174fef98bc4ebef5d.png)
Keep the same file name and hit Open.
-7cb839f72eb898e4c3159ffbe7900b32.png)
Now the path is correct.
Notice that the template CharacterBody3D: Basic Movement is selected.
Click Create.
-76b85617ba65dea28445b87789f2f5d2.png)
Then you’ll see the basic movement template code.
-fb986b0537ab2d3f4a67cc59150f1a21.png)
For our project, we need a slightly different script.
(I’m giving it to you because this tutorial is not focused on advanced coding yet.
We will learn coding step-by-step later.)
Replace everything in your script with the following:
extends CharacterBody3D

@export var SPEED = 3.0
@export var JUMP_VELOCITY = 4.5
@export var SENSITIVITY = 0.003

@onready var camera_3d: Camera3D = $Camera3D

func _ready():
	Input.set_mouse_mode(Input.MOUSE_MODE_CAPTURED)

# Handle mouse look and quit input
func _unhandled_input(event):
	if event is InputEventMouseMotion:
		rotate_y(-event.relative.x * SENSITIVITY)
		camera_3d.rotate_x(-event.relative.y * SENSITIVITY)
		camera_3d.rotation.x = clamp(camera_3d.rotation.x, deg_to_rad(-40), deg_to_rad(60))

	# Quit game when Esc is pressed
	if Input.is_action_just_pressed("esc"):
		get_tree().quit()

func _physics_process(delta: float) -> void:
	# Add the gravity.
	if not is_on_floor():
		velocity += get_gravity() * delta

	# Handle jump.
	if Input.is_action_just_pressed("jump") and is_on_floor():
		velocity.y = JUMP_VELOCITY

	# Get the input direction and handle the movement
	var input_dir := Input.get_vector("move_left", "move_right", "move_forward", "move_backward")
	var direction := (transform.basis * Vector3(input_dir.x, 0, input_dir.y)).normalized()
	if direction:
		velocity.x = direction.x * SPEED
		velocity.z = direction.z * SPEED
	else:
		velocity.x = move_toward(velocity.x, 0, SPEED)
		velocity.z = move_toward(velocity.z, 0, SPEED)

	move_and_slide()
Switch back to the 3D view and press Ctrl + S to save.
Save Player as a Scene
It’s a good time to save the Player as a scene. We already did this before for "TheBox".
- Right click on the Player.
- Click Save Branch as Scene.
- Carefully save it inside the correct scenes folder.
Finally, it will look like the image below:
-03c83f6ee7fec84db63e67c5a0082042.png)
The Island Map
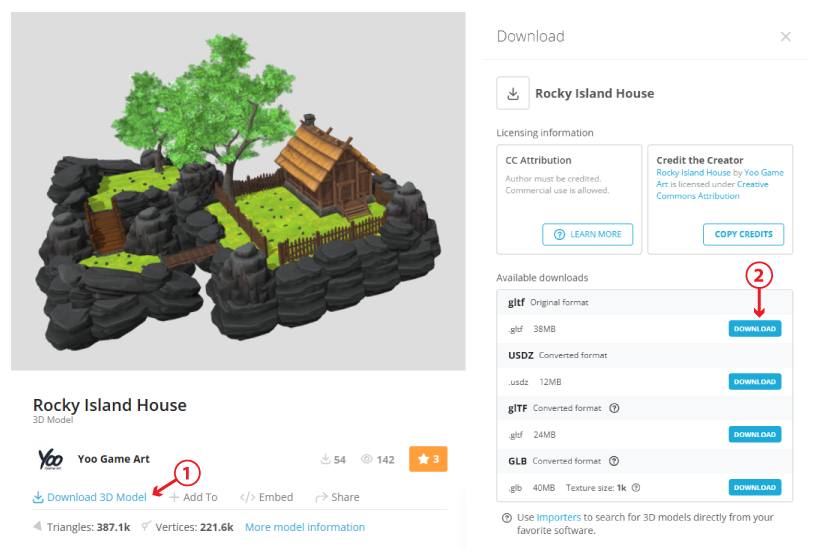
To keep things simple, I’ve prepared a small 3D island map for you.
Download it from this link: Rocky Island House
First, open your assets folder.
You can easily open folders from the FileSystem tab.
Right click on the assets folder and click Open in File Manager.
-d2cd03371b54950d31b04a7cf911f378.png)
This will open your assets folder.
Next, extract the downloaded zip file. Inside it, you’ll find a folder named "Map."
Copy the extracted Map folder into your project’s assets folder.
Then it will look like this:
-5ac9b7d12e753232bded1caf3acbf08a.png)
Switch back to Godot.
It will import the files automatically.
Now you’ll see the Map folder inside the FileSystem.
-741d41eb20f287dc2d30aae0962d478d.png)
We need to locate the 3D model file.
Use the search box and type "map".
You’ll see Map.gltf appear.
-5916453bd7ec86ddfb8fed4ff10133df.png)
Right-click it and select Instanciate.
-81fc9de89b72a22925e871172d3ad456.png)
Now the beautiful map appears in the viewport.
-cc592677de78741a3b6826fee136b8c9.png)
You may notice the player is hidden somewhere below it.
Move the player upward so you can see it.
-cfd42e271f3bdf34d04894b2ffc7c076.png)
If you try running the project now, you’ll get a bunch of errors like this:
-1ed64d3a26e99c3dd87c5c396001c0fb.png)
This is because we haven’t created the input actions yet.
Setting Up Input Actions
Go to Project → Project Settings
-8115784edffb383205064fbccd7ea290.png)
In the Project Settings window, switch to the Input Map tab.
-d7f91132403456ea0c48f6417171df1e.png)
In the Add New Action box, type move_forward and press Add.
-2141acc755480af86b6fcf8ebe534411.png)
Repeat this process until you have these actions:
move_forward
move_backward
move_right
move_left
jump
esc
-51258bc5702d54d33e9f221895f84574.png)
These names must match exactly, because the script uses these actions for movement.
Now click the little plus icon next to move_forward action.
-c0d0adb880262cd43dac96725badcd88.png)
A small window appears and waits for your input.
Press W on your keyboard.
-79a58d0a1ae0f508122ddfc2de6f6f9e.png)
Then hit OK.
Now it looks like this:
-db7d1816f29049621acf3aa1d66ce7fa.png)
I also added the Up Arrow as a second key.
So now move_forward can be triggered by W or Up Arrow.
-3ea734cc58ea5bbf61342efba06324b0.png)
Repeat this for all actions:
| Action | Keys |
|---|---|
move_forward | W / Up Arrow |
move_backward | S / Down Arrow |
move_right | D / Right Arrow |
move_left | A / Left Arrow |
jump | Spacebar |
esc | Esc key |
Once everything is assigned, it should look like this:
-28372e06acafc6e8209e6f7a2b726e4b.png)
Close the window.
Now finally, run the project!
Walk around using W A S D, look around with the mouse,
and press Esc to exit.
-c55285057a53efdc32d6edc1b9144796.png)
If you get errors when running the project, make sure all input action names are typed correctly.
(move_forward, move_backward, move_right, move_left, jump, esc)
If you’ve followed everything up to this point - congratulations!
You now have your very own walking simulator.